How to create a new Qunicorn-Pilot
Create a new python file in the qunicorn_core.core.pilotmanager directory. The qunicorn_pilot.py.
- For the creation you can also just copy the base_pilot.py file and rename it. Keep in mind that the supported_languages and provider_name is set in the “implement your pilot chapter”.
- After creating the Pilot class which extends the base_pilot, add your pilot to the “PILOTS” list in the pilotmanager.py file.

Add your pilot to the qunicorn_core.core.pilotmanager directory in the __init__.py file.
Implement your pilot.
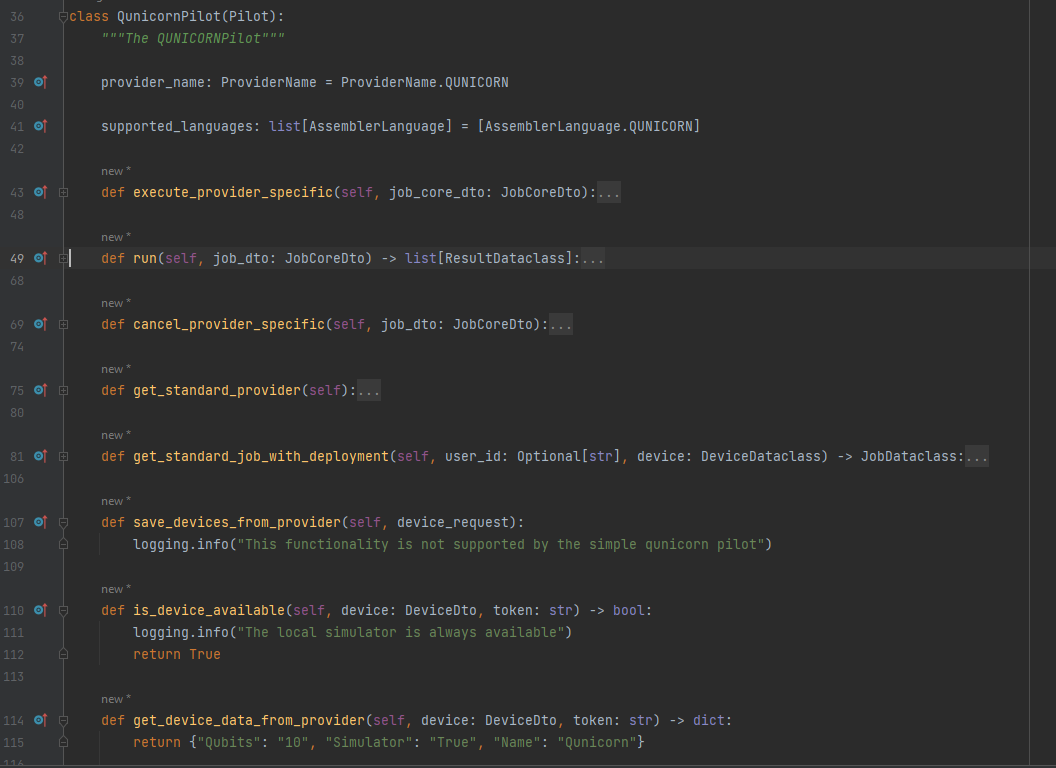
Implement your pilot
- Define the qunicorn provider by adding a new enum value to the ProviderName.py enum and set it as your provider_name.

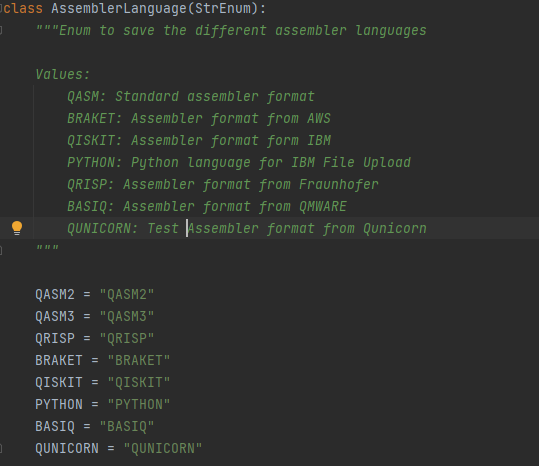
- Define the supported_languages. Add a new qunicorn enum value to the AssemblerLanguage.py enum.
Implement all methods that raise a “NotImplementedError” in the base_pilot.py file.
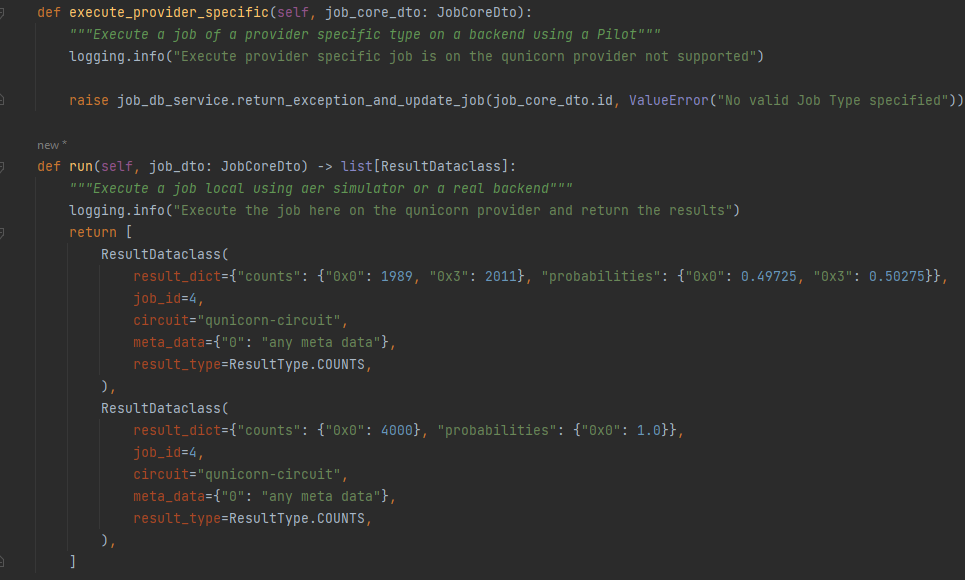
- 3.1: First we fill the execute methods: We don’t need a provider-specific execution if we only have one default run method. The run method is just returning exemplary results. (We do not actually have a qunicorn execution environment)
- 3.2: Second, we need to add a default Job and Deployment to the pilot to simplify testing:

- 3.3: After adding also the other necessary methods that we do not support we are done with the pilot:
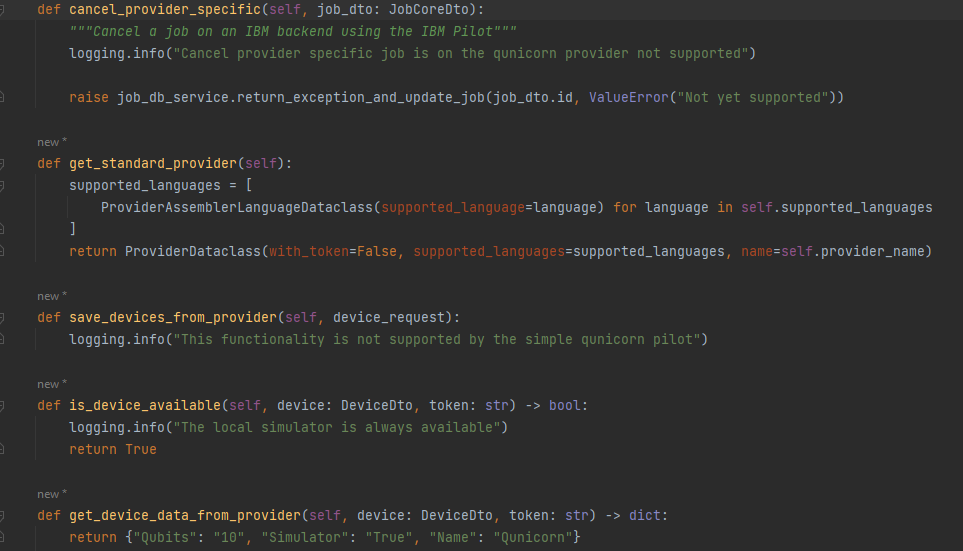
Check out the comments in the base_pilot.py file for more information about the methods and also find some examples in aws_pilot.py and ibm_pilot.py.
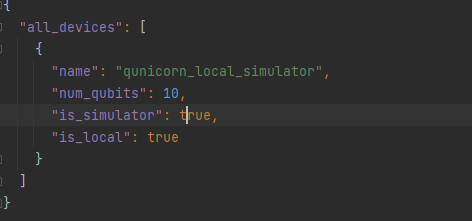
- Add a .json-file to add a default qunicorn device and add it to the pilot_resources folder. It is important that the name of the file is ProviderName_standard_devices, in our case qunicorn_standard_devices, so it can be recognised and used automatically.
Test if the current pilot already works
Therefore we need to restart the database: “flask recreate-and-load-db” (If this throws an error delete your db-instance first and check in the README.md if the command changed)
After that the qunicorn-app can be started and the qunicorn-api can be opened: “localhost:5005/swagger-ui/”
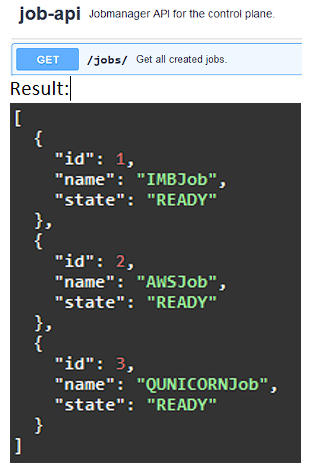
- Now you can first test if the default jobs are loaded in the database. In the results we see that we have a new third qunicorn-job.
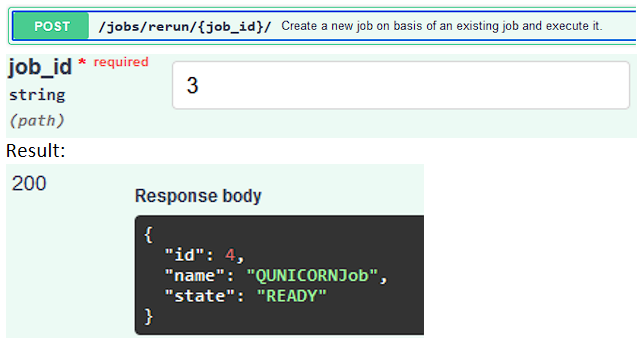
- To test if we can run a job on our qunicorn-pilot we can use the rerun api endpoint: (As it is executed asynchronously we cannot see the results directly, we only get a job-id).
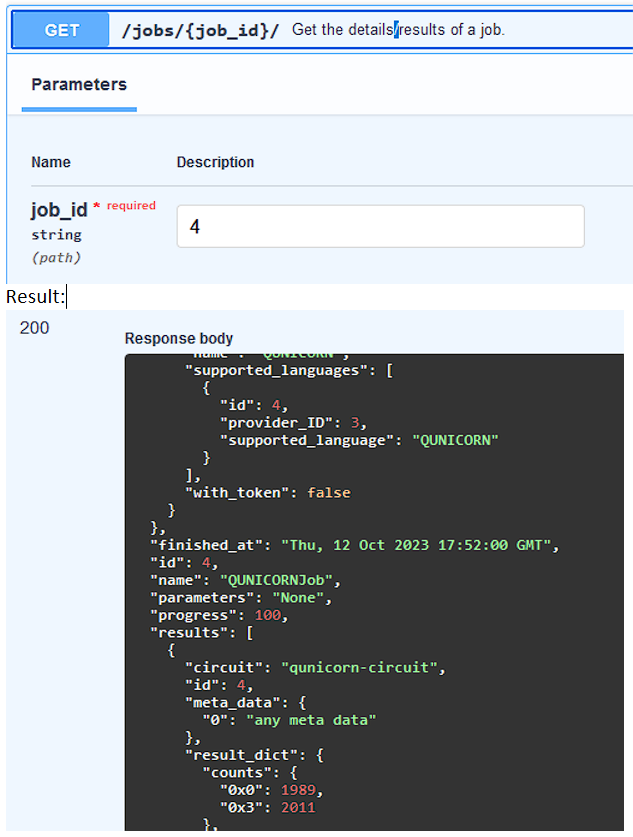
- To checkout the results we use the next api endpoint with the job id we got in our response (id=4).
Change the transpile and preprocessing manager - if necessary
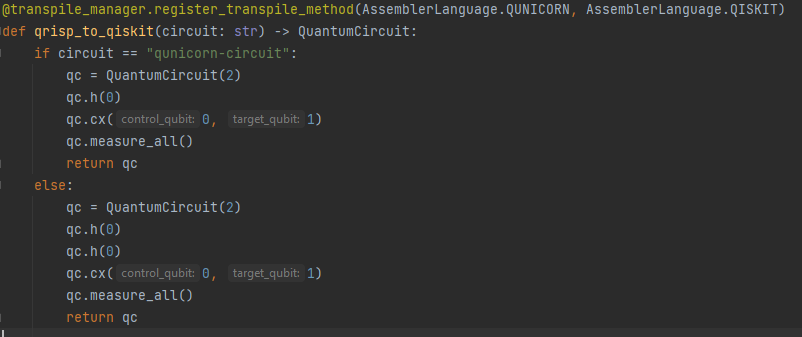
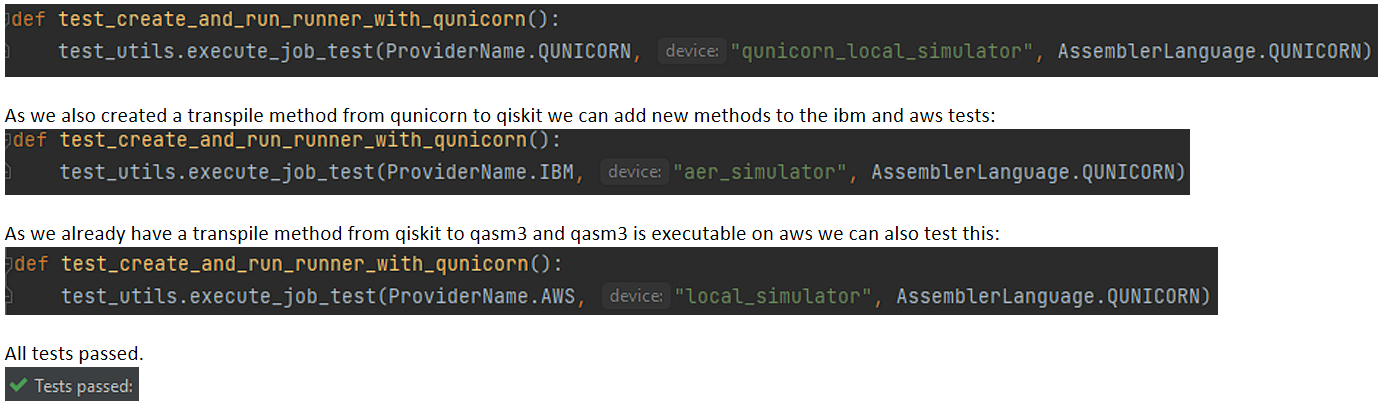
- If we now also want to run our qunicorn circuit on IBM we need to add a transpile method in the transpile_manager.py. This transpile method transpiles QUNICORN into QISKIT.
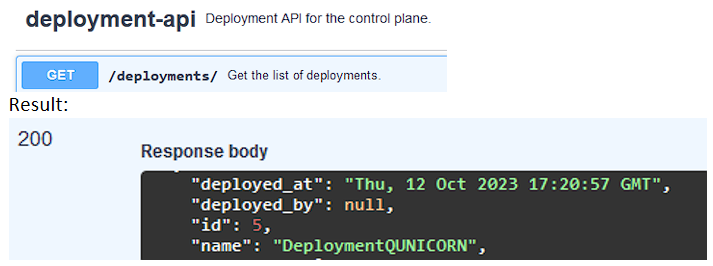
- To test if our transpile method works we need to save our changes and then go to the qunicorn-api again: First we need to find out which is our default qunicorn-deployment: Our result is a list of deployments, we just take the one that we created:
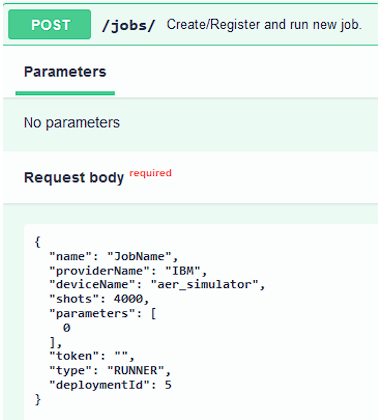
- Together with the deployment Id, we can now create a new job running on IBM.
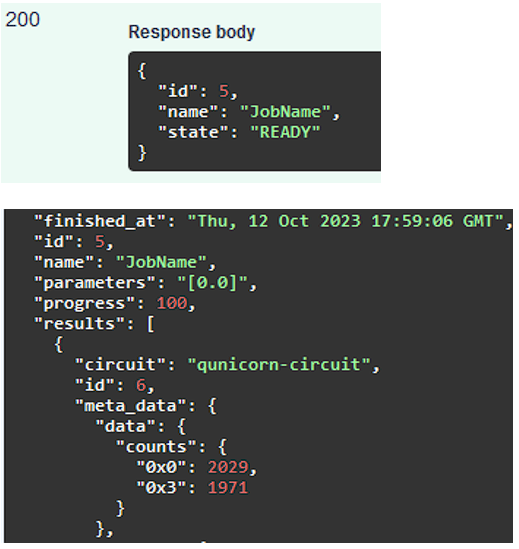
- This Job will take our qunicorn-circuit, transpile it to a qiskit circuit and then execute it on ibm: We now get the results again and see that we also have meta_data that is specific for ibm.
Add some tests and documentation
- The pilot should be working now and we need to add a small test. Therefore we need to add the two .json-files in the test/test_resources folder.
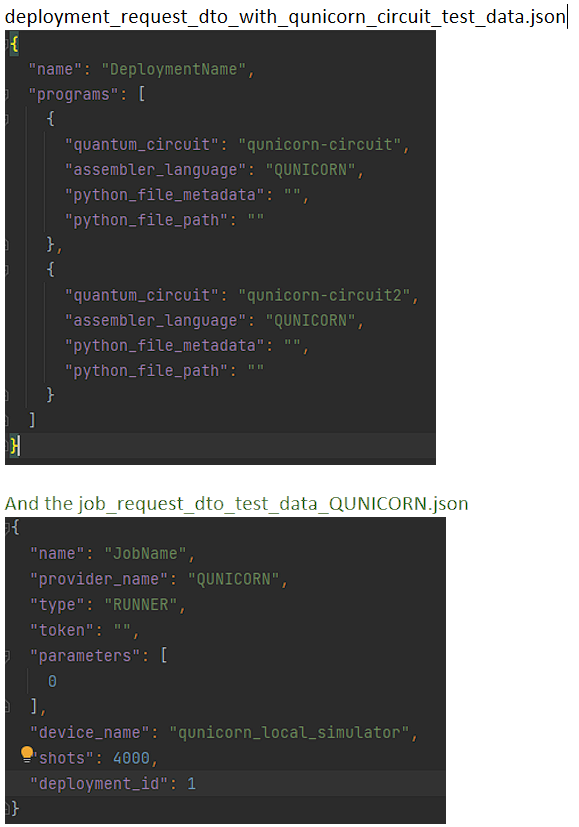
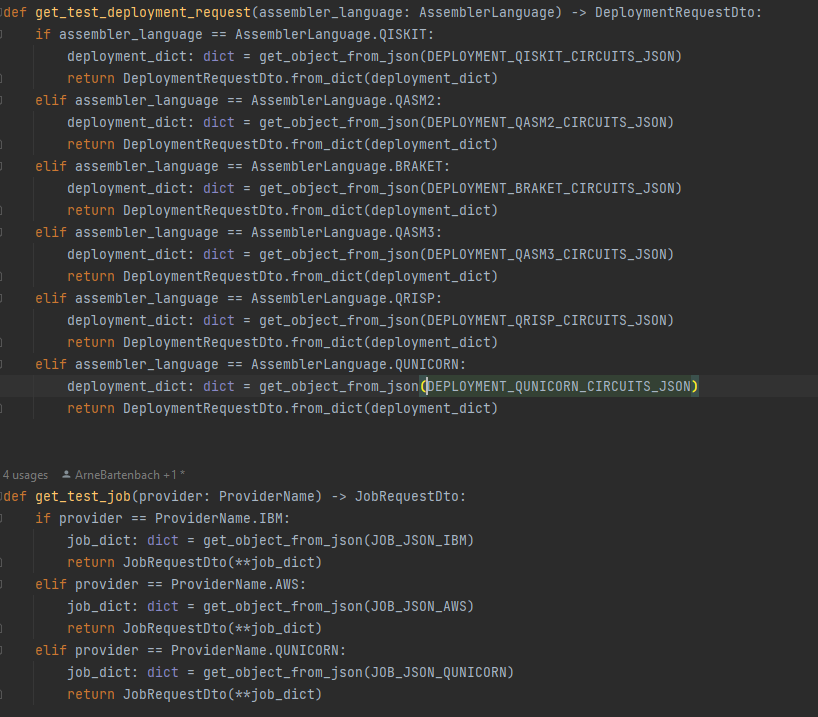
- We also use them in the test_utils.py. Inside it, create these two static variables: DEPLOYMENT_QUNICORN_CIRCUITS_JSON=”deployment_request_dto_with_qunicorn_circuit_test_data.json” and JOB_JSON_QUNICORN=”job_request_dto_test_data_QUNICORN.json” And add them to the get_test_jobs/deployments:
- After that a new test file can be created in automated_tests: test_qunicorn_job_execution.py to use the test method and test the pilot end-to-end:
Do not forget to add comments and documentation to your newly implemented code.